
Add a form to your website
A website form asks the questions you pick and brings every answer into Freesbe. You need to be a Freesbe owner or admin, and able to change your website’s pages.
1. Make the form
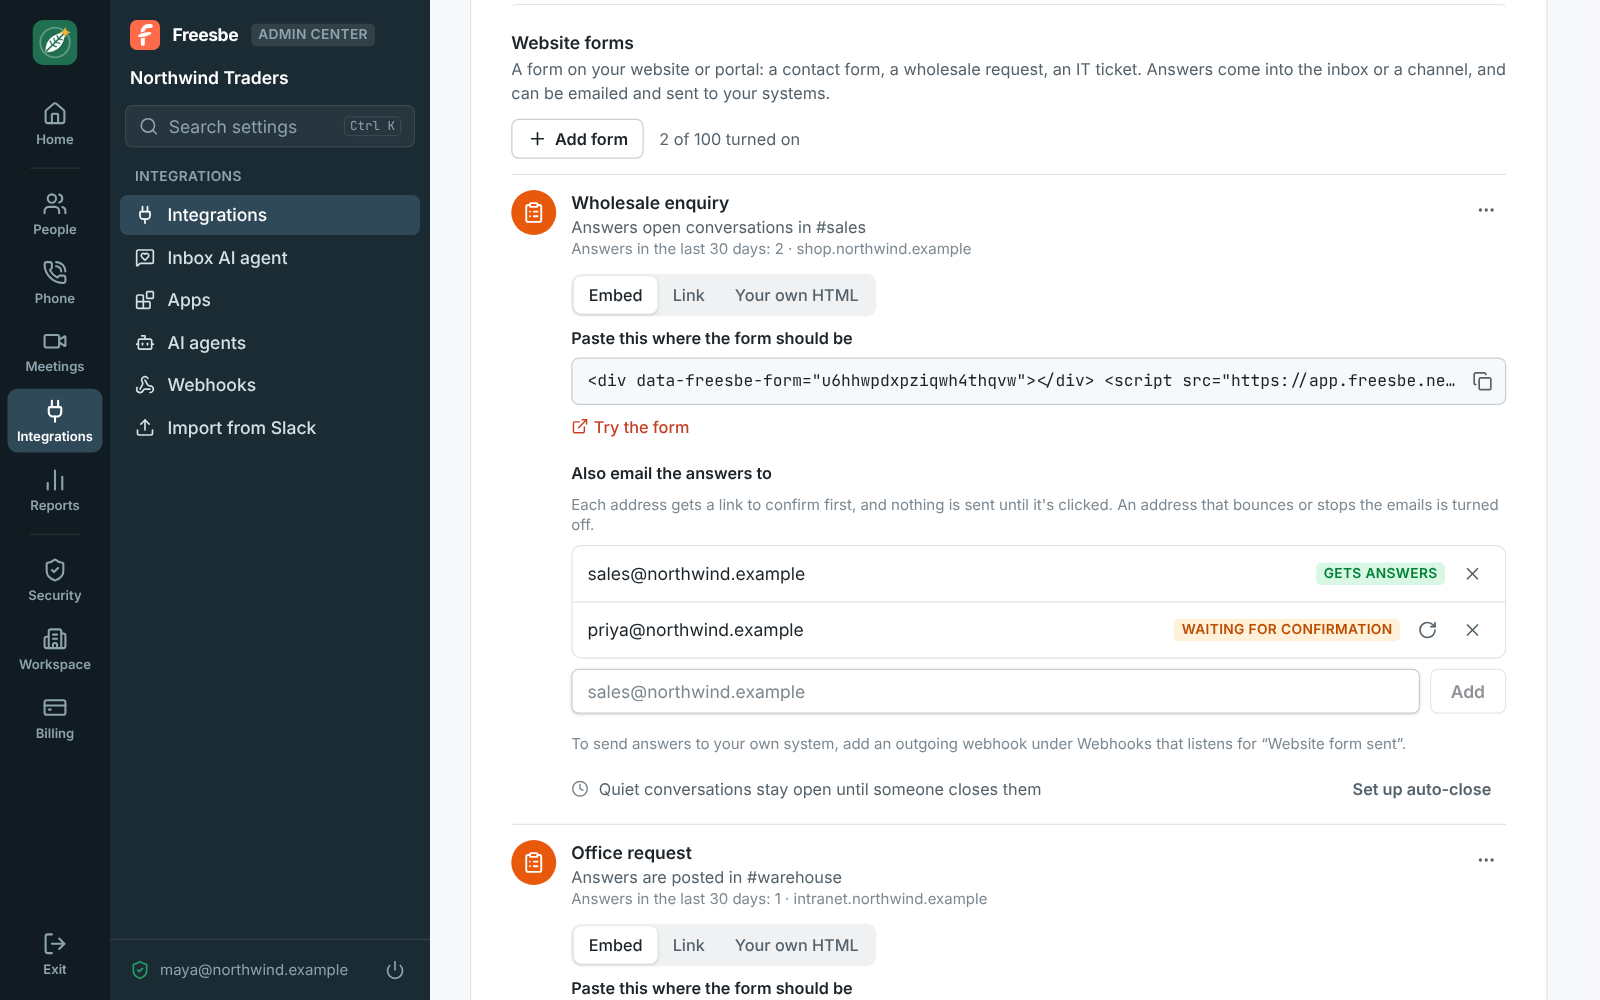
Section titled “1. Make the form”- In the Admin Center, open Integrations → Customer inbox and, under Website forms, click Add form.
- Give it a name and a title, and pick Where answers go:
- Customer inbox for customers: each answer is a conversation, and your replies are emailed to them.
- Post in a channel for requests inside your team, like an IT or office form on your intranet.
- Pick the channel, then add your questions. Tick Required for the ones people must answer.
- Under Websites it can appear on, enter your site, like
https://www.northwind.example. - Click Add form.
2. Put it on your site
Section titled “2. Put it on your site”On the form’s row, pick Embed and copy the two lines. Paste them into your page where the form should be: most site builders have an “HTML” or “Embed code” block for this. Click Try the form to send yourself a test answer.
Prefer your site’s own design? Pick Your own HTML and copy the starting point. Keep each
field’s name as it is: that’s how Freesbe knows which question it answers.
3. Email the answers, if you like
Section titled “3. Email the answers, if you like”Under Also email the answers to, add an address like sales@northwind.example. Its owner gets an email to confirm first; once they click Yes, send me the answers, every answer is emailed to it, and replying to that email answers the person who sent the form.
Good to know
Section titled “Good to know”- Every workspace can have one form. The Forms add-on brings 10 on Business and 100 on Corporate.
- To send answers to your CRM or your own system, add an outgoing webhook that listens for Website form sent under Integrations → Webhooks.
- Turning a form off (its ⋯ menu → Turn off) takes it off your site until you turn it back on.
See Customer inbox for everything forms do.
Answers come from the Freesbe guides and are written by AI, so check the linked guide before relying on one. Please don't include personal details such as emails or passwords.